Hi, Friends!
And Happy Spring! I am so excited to be bringing you my Daisy Garland crochet pattern. These little daisies are so playful and quick to make, and they will bring a touch of spring to any space. You can make these daisies individually, and then turn into them into a garland, ornament, or even use them as an applique on a crochet blanket!
This pattern is available as a fully illustrated, ad-free PDF pattern! Click here to shop.
You can also purchase an Eco-Friendly Crochet Kit to use as you follow along with this pattern! Click here to shop.

Disclosure: Some of the links in this post are affiliate links. This means that if you purchase items using some of the links in this post, my handmade business will earn a small commission at no extra cost to you!
There is a full video tutorial available for this patttern! You can follow along with the step-by-step video here:
Daisy Garland Crochet Pattern
Materials:
Crochet Hook – size needed to obtain desired gauge
We Crochet Wool of the Andes Worsted Yarn
Stitch marker
Tapestry needle
Scissors
Eco-friendly Materials:
At Our Friendly World we believe it is important to be conscious of the materials we use, and we always strive to use the most sustainable options in our craft. This way, your handmade item can be wonderful for you and the planet! Below you will find fun, eco-friendly ideas for the materials needed for this pattern:
Yarn: Avoid yarn that contains plastic (polyester, acrylic, nylon, etc.) and opt instead for natural fibers. These options include wool, cotton. linen, Tencel, and many others. Yarns made of wool and cotton are very common and will not leave behind microplastics at the end of their life! You can find our favorite wool yarn here.
Our favorite materials used to create this pattern!
We Crochet Wool of the Andes Worsted Yarn – Cloud, Brass Heather
Abbreviations:
Ch – chain
St - stitch
Sc – single crochet
Inc – increase. Work two single crochet into designated stitch.
Hdc – half double crochet
Dc – double crochet
Sl st – slip stitch
Sk st – skip stitch
Gauge:
Gauge is not a necessity in this pattern. Play with different yarn weights, hook sizes, and quantities flowers to change the size of your garland! The garland pictured in this pattern was made with worsted weight yarn and a 3mm hook.
Notes:
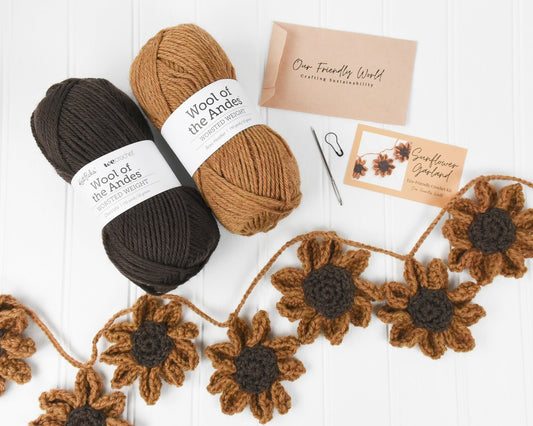
This pattern includes instructions for a six-petal flower and a circular center, which are sewn together. The finished flowers are then connected by a chain to form a garland. Mix and match your colors and spacing to customize the design of your garland! Patterns are worked in continuous rounds. Do not slip stitch to join rounds unless specified.
Let's Get Stitching!
Flower
Round 1: 6 sc in a magic circle. = 6
Round 2: *sc, ch 4, starting in 2nd chain from hook sc 3, sc in same base st as first st. Repeat from * 5 more times, for a total of 6 times around the circle. This makes 12 base stitches with 6 “stems”. = 48 including remaining loops from ch 3
Round 3: *Sl st to next st. Working in the loops left from the ch 3 of the previous round: sc, 2 hdc, 2 dc. Working in the 3 sc of the previous round: 2 dc, 2 hdc, sc. Sl st to same base st. Repeat from * 5 more times to complete 6 petals. = 72
Sl st and fasten off.
Flower Center
Round 1: 6 sc in magic circle. = 6
Round 2: inc x 6 = 12
Sl st and fasten off, leave a long yarn tail for sewing.
Making Up
Once you have your flowers and centers made, you will assemble them to make a finished flower. With the right side of each piece facing you, center the circular piece in the middle of the flower. Using the yarn tail from the circle, sew through the front and back of both pieces around the circle. Secure with a knot at the back of the flower. Weave in all ends and trim.
Once all of your flowers are finished, you will be able to assemble your garland. With your main color, secure a knot leaving a loop for hanging. Using the yarn end attached to your skein, slip stitch into the top center of a flower petal, with the right side facing you. Tightly chain 15 (or any desired number) and slip stitch to the top center of a petal on the next flower. A very tight chain is recommended to prevent excess stretching of your garland.
Continue this until your last flower, or until your garland is as long as you’d like. After attaching your last flower, tie a knot with another hanging loop at the end. Cut the yarn, weave in all ends and trim.

I hope you loved this pattern! Make sure you check out the links below to stay in touch!
And thank you so much for supporting my small business!
♥️ Kennedy


